Estackly can send automatic WhatsApp messages — to your restaurant and to your customers — for new orders, order status changes, and reservation confirmations. This is done through Meta's official WhatsApp Cloud API, which means messages are sent directly from your own WhatsApp Business account at a very low cost, with no third-party middleman.
This guide walks you through getting your API credentials from Meta, entering them into Estackly, enabling the notification triggers you want, and testing the connection.
Before you start: get your Meta WhatsApp credentials
WhatsApp notifications run on Meta's WhatsApp Cloud API, so you first need a small one-time setup on Meta's side:
- Go to Meta for Developers and log in with the Facebook account you want to manage your restaurant's WhatsApp with.
- Create a new App (choose the "Business" app type).
- From the App Dashboard, add the WhatsApp product to your app.
- Under WhatsApp → Getting Started, you will see a test phone number along with:
- A temporary access token — generate a permanent token from System Users for production use.
- A Phone Number ID.
- A WhatsApp Business Account ID (WABA ID).
- Under WhatsApp → Message Templates, create and submit the templates you want to use (e.g. for new order alerts, order status updates, reservation confirmations) and wait for Meta to approve them.
Keep this tab open — you'll copy these three values (Access Token, Phone Number ID, WABA ID) into Estackly in the next step.
Open WhatsApp settings in your dashboard
- Log in to your restaurant admin dashboard.
- Go to Settings from the sidebar.
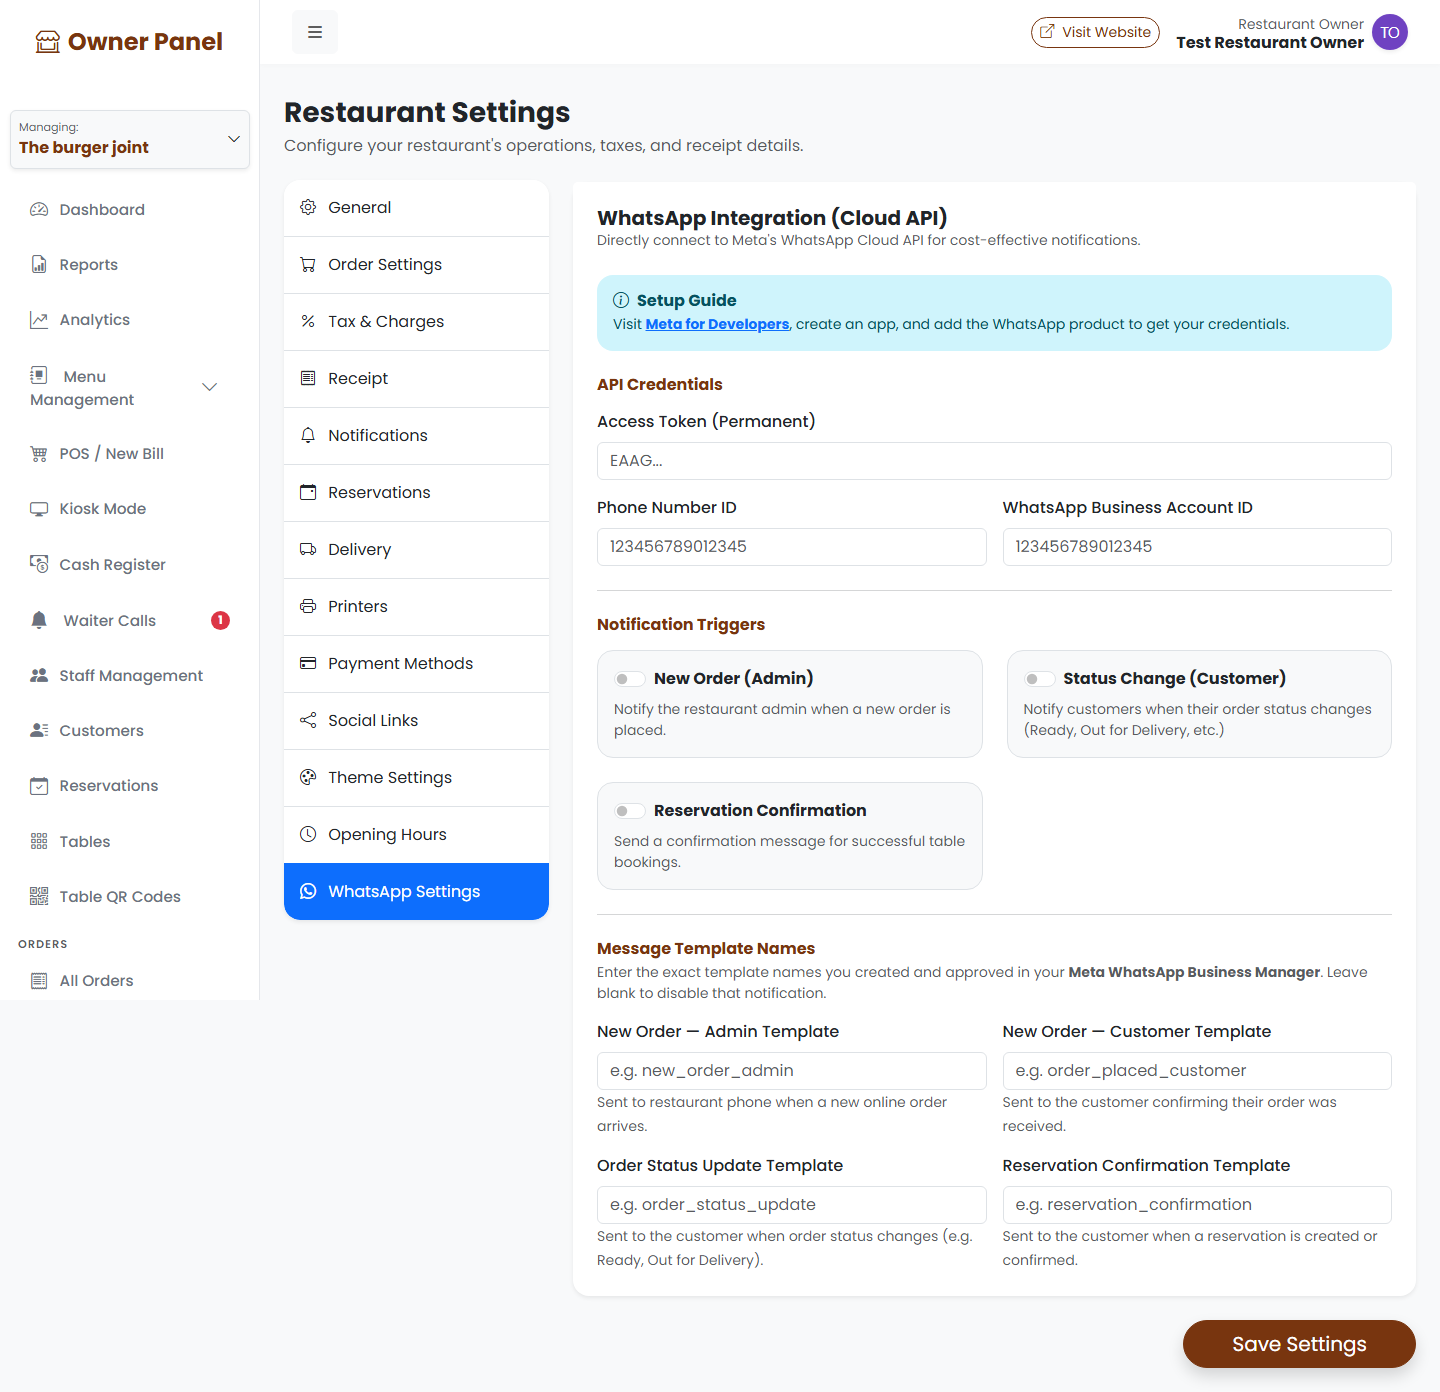
- Click the WhatsApp Settings tab. You'll see the "WhatsApp Integration (Cloud API)" panel with a blue setup-guide box at the top linking to Meta for Developers.
Enter your API credentials
In the API Credentials section, fill in the three values you copied from Meta:
- Access Token (Permanent) — paste your long-lived token from Meta (starts with
EAAG...). This field is masked for security. - Phone Number ID — the numeric ID of the WhatsApp number that will send messages.
- WhatsApp Business Account ID — your WABA ID from Meta Business Manager.
Click Save Settings at the bottom of the page to store these credentials.
Test the connection
Once an Access Token and Phone Number ID are saved, a Test Connection button appears in the WhatsApp Settings tab. Click it to verify your credentials against the Meta API — this checks that your token and phone number ID are valid without sending any actual message to a customer.
If the test fails, double-check that:
- You copied the full access token without extra spaces.
- The Phone Number ID matches the number shown in Meta's WhatsApp dashboard.
- Your access token has not expired (temporary tokens expire in 24 hours — use a permanent System User token).
Enable notification triggers
In the Notification Triggers section, turn on the alerts you want using the toggle switches:
- New Order (Admin) — sends a WhatsApp message to your restaurant's number whenever a new order is placed.
- Status Change (Customer) — notifies the customer on WhatsApp when their order status changes (e.g. Ready, Out for Delivery).
- Reservation Confirmation — sends the customer a confirmation message when a table reservation is created or confirmed.
Add your message template names
WhatsApp Cloud API only sends messages using pre-approved templates. In the Message Template Names section, enter the exact template names you created and got approved in Meta WhatsApp Business Manager:
- New Order — Admin Template — sent to your restaurant's phone when a new online order arrives.
- New Order — Customer Template — sent to the customer confirming their order was received.
- Order Status Update Template — sent to the customer when their order status changes.
- Reservation Confirmation Template — sent to the customer when a reservation is created or confirmed.
The template names must match exactly (including case and underscores) what you submitted to Meta. If a template name field is left blank, that particular notification will not be sent — so you can enable only the alerts you have approved templates for.
Save and go live
Once your credentials, toggles and template names are in place, click Save Settings. From this point on, Estackly will automatically send WhatsApp messages for the events you enabled — no further action is needed for each order or reservation.
Troubleshooting tips
- If messages aren't sending, run Test Connection first to rule out a credentials issue.
- Make sure each Meta template is in Approved status — pending or rejected templates will silently fail.
- Permanent access tokens are tied to a System User in Meta Business Settings — temporary tokens from the Getting Started page expire and will need to be replaced.
- If a customer doesn't receive a message, confirm their phone number is saved in the correct international format (with country code).